


Step-by-Step Guide to the Water Damage Restoration Process
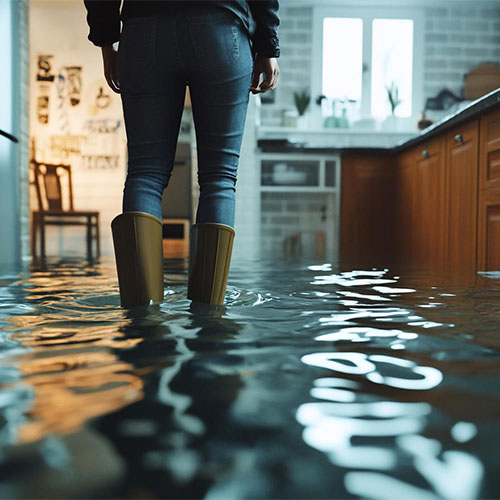
Water damage can escalate quickly from a minor household problem into a major repair project. A burst pipe, appliance leak, roof intrusion, or flooding can send moisture into flooring, drywall, cabinets, insulation, and other hidden areas where damage may continue even after visible water is removed. The water damage restoration process is designed to stop the source, assess the extent of the damage, remove standing water, dry affected materials, address contamination, and restore the property safely. Understanding each stage helps homeowners respond quickly, avoid unnecessary repairs, and make informed decisions about when professional restoration is needed.
Article Summary
- Water damage restoration involves more than removing visible standing water; it also requires moisture assessment, structural drying, cleaning, and appropriate repairs.
- Fast action is important because EPA guidance recommends drying wet or damp materials within 24–48 hours when possible to help prevent mold growth.
- Not every water-damaged material needs to be replaced. The decision depends on the material, contamination, moisture exposure, and whether it can be safely restored.
- Professional drying should be verified through moisture measurements and documented monitoring rather than appearance or touch alone.
- Sewage and contaminated floodwater require additional safety precautions and may change the materials and methods used during cleanup.
- Some projects require mitigation and drying first, followed by reconstruction of materials that cannot be restored.
Transform Your Space with BUILPIRE – Book Your Consultation Today!
Emergency Contact and Inspection
The water damage restoration process begins with an immediate emergency call to a restoration company. Professional services typically respond within 1–2 hours. On arrival, technicians perform a comprehensive assessment using moisture sensors, thermal imaging, and detailed visual inspections. They identify the source of the water (e.g., clean water, gray water, or black water) and determine the class and category of damage.
This assessment is crucial for insurance documentation and helps formulate a targeted action plan. If structural integrity is compromised, temporary stabilization measures are applied to prevent further damage. Digital documentation is often provided to ensure a smooth insurance claim process.
Water Removal
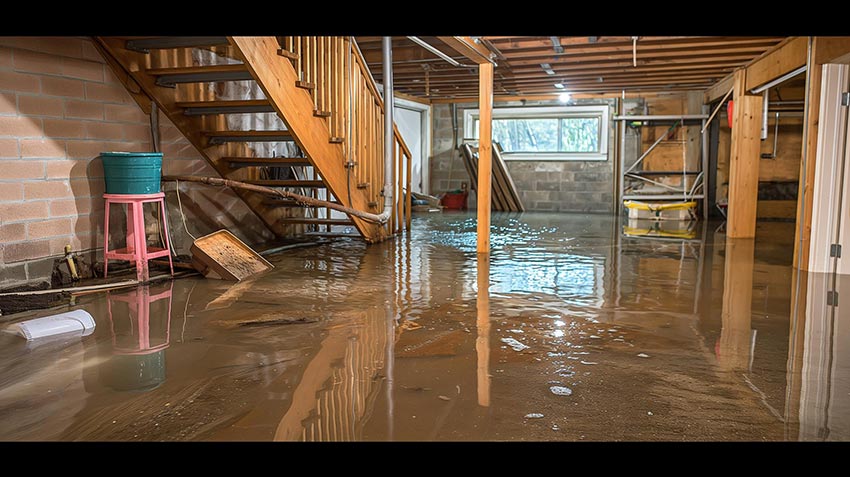
Once the assessment is complete, the water extraction phase begins. This stage uses high-capacity pumps and wet/dry vacuums to remove thousands of gallons of water. The objective is to eliminate all standing water as quickly as possible. In advanced cases, submersible pumps and truck-mounted extraction systems are used.
Water-soaked materials like carpets, rugs, and upholstery may be removed and taken off-site for drying or disposal. Items of high value are documented, and salvageable belongings are packed out for cleaning and restoration.
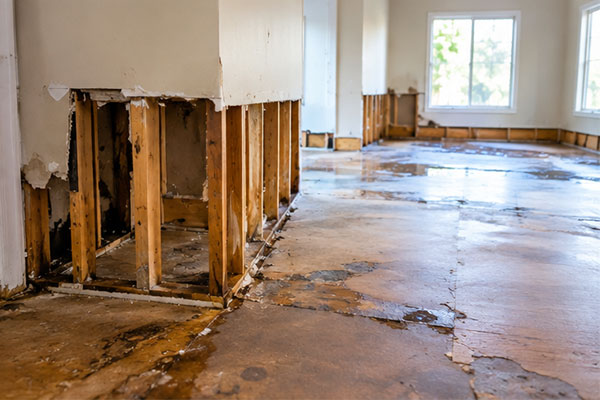
What Happens to Drywall, Flooring, Insulation, and Other Water-Damaged Materials?
Not every water-damaged material automatically needs to be replaced. The decision depends on the type of water involved, how long the material has remained wet, the material’s porosity, the extent of contamination, and whether it can be thoroughly cleaned and dried.
Porous materials require particular attention because moisture and contamination can penetrate into areas that are difficult to clean. Carpet, carpet padding, ceiling materials, insulation, upholstered furniture, and other absorbent materials may require removal when they cannot be adequately cleaned and dried. EPA guidance notes that some porous materials affected by mold may be difficult or impossible to clean completely and may need to be discarded.
Drywall and other building components should also be evaluated rather than removed automatically. If materials can be safely dried and remain structurally sound and uncontaminated, restoration may be possible. If they have been exposed to contaminated water, remain saturated, or have suffered significant deterioration, removal and replacement may be necessary.
The objective is not to remove as much material as possible. A professional restoration plan should balance safety, contamination control, structural condition, drying potential, and the cost of unnecessary replacement. This approach can help preserve salvageable materials while preventing moisture-related problems from being concealed inside the building.
Drying and Dehumidifying
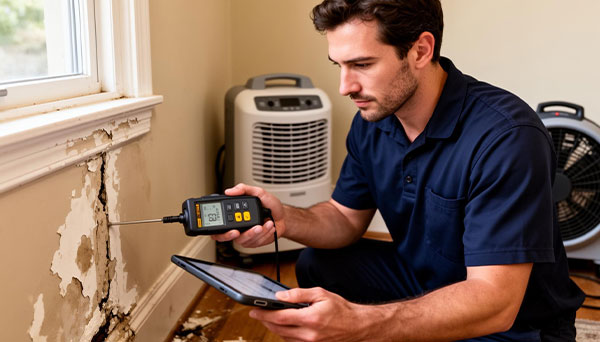
After surface water is removed, structural drying begins. Industrial-grade dehumidifiers and air movers circulate dry air to remove residual moisture. Walls, ceilings, and subfloors are carefully monitored using hygrometers and thermal imaging.
This stage can take several days depending on the extent of the saturation and weather conditions. Drying logs are kept to track progress and adjust equipment as needed. Drying is complete only when moisture levels return to industry-standard levels. Skipping or rushing this step may result in mold, structural deterioration, and poor air quality.
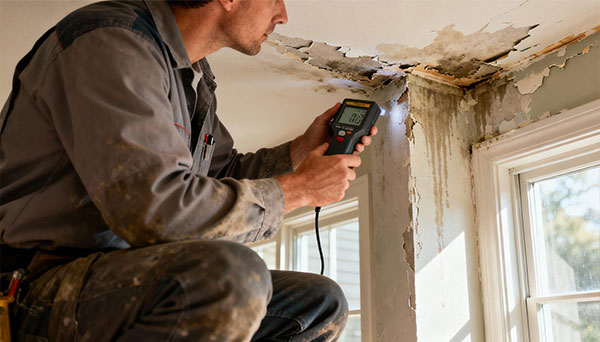
A surface can feel dry while moisture remains inside drywall, flooring, subfloors, or other building materials. Professional water damage restoration should include moisture measurements and ongoing monitoring rather than relying only on visual inspection or touch. Ask the restoration company what moisture readings they are using and how drying completion will be documented.
How to Know When Water Damage Is Truly Dry
Water damage is not considered fully resolved simply because standing water is gone or a surface feels dry to the touch. Moisture can remain inside drywall, flooring, subfloors, insulation, cabinets, and other building materials long after visible water has disappeared. Professional restoration therefore relies on moisture measurements and ongoing monitoring rather than appearance alone.
A proper drying plan typically includes identifying affected materials, establishing moisture readings, placing air movers and dehumidifiers based on the condition of the structure, and documenting readings throughout the drying process. The goal is to bring affected materials back toward appropriate moisture conditions for the building and material involved.
This distinction matters because closing walls, reinstalling flooring, or painting over materials that still contain excessive moisture can trap moisture inside the assembly. That can contribute to microbial growth, material deterioration, odors, and additional repair costs. The ANSI/IICRC S500 standard specifically addresses psychrometry, drying technology, instruments, inspections, project documentation, and risk management as parts of professional water damage restoration.
Homeowners should therefore ask how moisture will be measured, what areas will be monitored, and how the restoration company will document that drying is complete. A professional drying process should be based on measured conditions rather than a visual inspection alone.
Cleaning and Sanitizing
Cleaning is one of the most overlooked yet critical steps in the water damage restoration process. All exposed surfaces are cleaned with antimicrobial and antibacterial solutions. This includes disinfecting flooring, cabinetry, and HVAC systems to prevent contamination and mold growth.
In black water cases (such as sewage backup), hazardous waste removal is performed, and specialized sanitation protocols are followed. Air scrubbers with HEPA filters are used to purify the air and remove lingering odors. Textiles, furniture, and electronics are either restored or safely disposed of.
Not all water damage should be handled in the same way. Water associated with sewage or contaminated flooding can introduce biological hazards that require additional precautions and may change which materials can be safely restored. Before beginning cleanup, identify the source and avoid contact with potentially contaminated floodwater. If sewage or contaminated water is involved, professional assessment and appropriate protective procedures are especially important.
Restoration and Repairs
The final phase of the water damage restoration process involves full-scale repairs and renovations. This may include replacing drywall, painting, reinstalling floors, cabinetry, and restoring structural components like beams or joists.
In some cases, homeowners take the opportunity to upgrade features or redesign affected areas. Modern water damage restoration often includes integrating waterproof materials and smart sensors to monitor for future leaks. Project managers coordinate repairs and provide a timeline and cost estimate, ensuring that the home is returned to its pre-damage condition—or better.
Why Timely Action Matters
Delays in response can escalate the damage from a minor inconvenience to a major health and structural hazard. Mold can begin to grow in as little as 24 hours. Electrical systems, insulation, and load-bearing structures can become compromised quickly. Responding swiftly reduces cost, complexity, and risk.
When water enters a home, the priority should be to stop the source and begin safe drying as quickly as possible. EPA guidance recommends drying wet or damp materials within 24–48 hours when possible to help prevent mold growth. This does not mean every water loss can be completely resolved within that period; it means delaying the start of drying can increase the risk of secondary problems.
Preventative Measures
• Install water leak detection devices. • Schedule annual plumbing inspections. • Regularly clean gutters and downspouts. • Ensure proper drainage around the property. • Use moisture barriers in basements and crawl spaces. • Maintain HVAC systems and check for condensation issues.
Being proactive reduces your exposure to water damage and prepares you for emergencies. Education about the water damage restoration process is the first step in resilience.
Water Damage Restoration vs. Reconstruction: What Does Your Home Actually Need?
Water damage projects do not all require the same level of work. In many cases, the first priority is mitigation: stopping the source of water, removing standing water, controlling moisture, and preventing additional damage. Restoration then focuses on cleaning, drying, treating affected materials, and returning the property to a safe and functional condition.
Reconstruction becomes necessary when water damage has affected materials or building components that cannot be restored through cleaning and drying alone. Depending on the property, this may include replacing drywall, flooring, insulation, cabinets, trim, or other damaged components.
Separating mitigation from reconstruction helps homeowners understand why an initial estimate may focus on water removal and drying while a later scope includes repairs. The full scope often becomes clearer after affected areas are opened, moisture conditions are documented, and materials have been evaluated.
For homeowners, one of the most useful questions to ask a restoration professional is: “Which parts of my home can be restored, and which parts require replacement?” A clear answer should be based on the condition and contamination of the materials rather than on a one-size-fits-all approach.
Partner with Professionals Like Builpire
When disaster strikes, partnering with experienced professionals like Builpire ensures a stress-free restoration experience. Builpire specializes not only in the water damage restoration process but also in home design and upgrades. From damage assessment to rebuilding, Builpire delivers tailored, high-quality solutions that restore beauty and functionality. Their design-focused restoration ensures your space not only recovers but transforms.
For more ideas and guidance, follow us on Instagram.
Frequently Asked Questions About Water Damage Restoration
How long does it take to dry out a house after water damage?
The drying time depends on the amount of water, affected materials, indoor humidity, ventilation, and the extent of the damage. Professional restoration teams monitor moisture levels throughout the process rather than relying on a fixed number of days.
How quickly should I start water damage cleanup?
Cleanup and drying should begin as soon as it is safe. EPA guidance recommends drying wet or damp materials within 24–48 hours when possible to help prevent mold growth. Electrical hazards, sewage, contaminated floodwater, or structural damage require additional safety precautions.
Should wet drywall and flooring always be replaced?
No. Replacement depends on the material, water source, contamination, duration of exposure, structural condition, and whether the material can be effectively cleaned and dried. Some materials can be restored, while contaminated or severely damaged porous materials may require removal.
Is it safe to clean up water damage myself?
Minor incidents involving clean water may sometimes be handled by homeowners when no electrical, structural, or contamination hazards are present. Larger losses, sewage backups, and contaminated floodwater should be assessed by qualified professionals because they can involve health, electrical, and structural risks.
How can I tell if water damage caused hidden moisture or mold?
Musty odors, warped flooring, swollen materials, peeling finishes, persistent humidity, and unexplained damp areas can indicate hidden moisture. Moisture meters and other inspection methods can help identify moisture behind walls, beneath flooring, or inside building assemblies where a visual inspection cannot.